She Plays with Mud
  • Hello
  • ChickenGarden
    • ChickenGarden Gallery
  • Mud Ovens
  • Tiny Home
    • Tiny Home Blog
    • Tiny Home Photo Gallery
  • Contact

It's all about the curves, baby!

7/11/2014

17 Comments


Making curved rafters for my little gypsy house

Curved roofs make me smile. 
As I planned my tiny house, I spent quite a few months in denial about this. Even while I drooled over images of shepherd's wagons and gypsy caravans, I told myself that a gambrel (barn) style roof was more practical. The barn look would be in character for a building in the Midwest. If I had a loft, a gambrel roof would offer increased shoulder room over a gable (peaked) roof. 

curved rafter jig
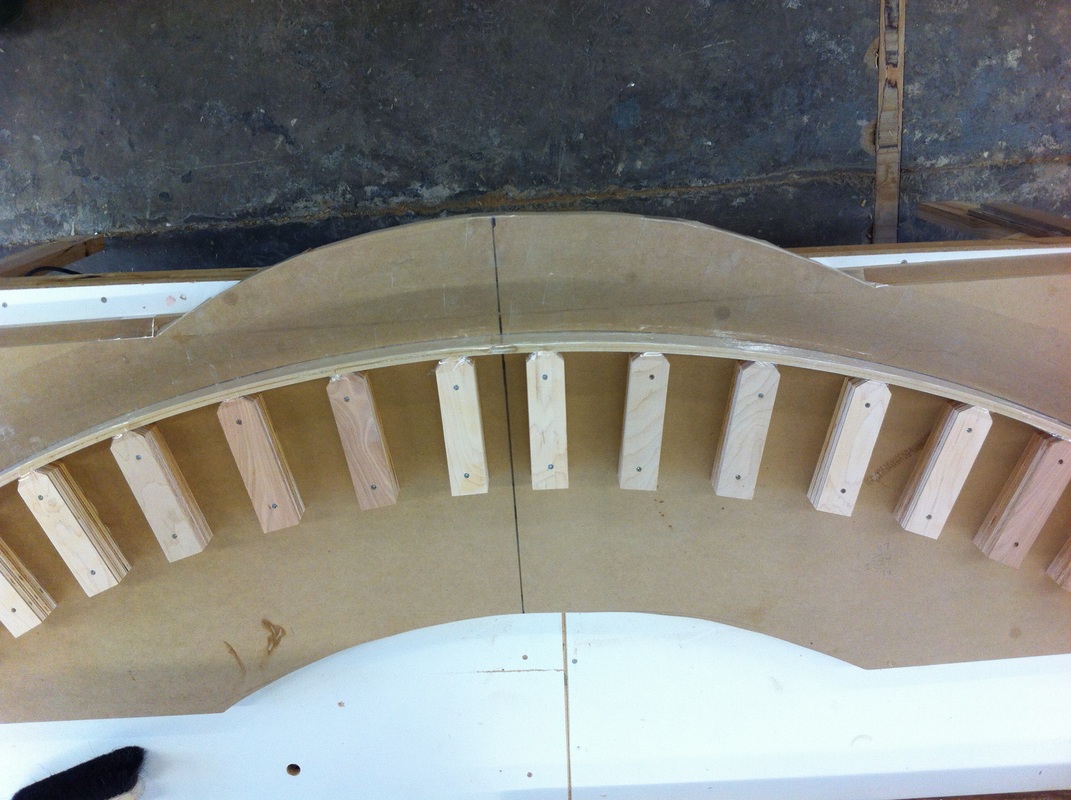
The jig for making the curved rafters.
And since I would be using dimensional lumber (not mud) straight lines would be easier to deal with than curves, and metal roofing was practically made for that type of roof! Also, wasn't April Anson's tiny barn-style house adorable?
Yes, yes, yes, yes, yes and yes.
But whenever I was inside a space with a curved roof I smiled. My body relaxed. I breathed more deeply.
curved rafter jig, clamps
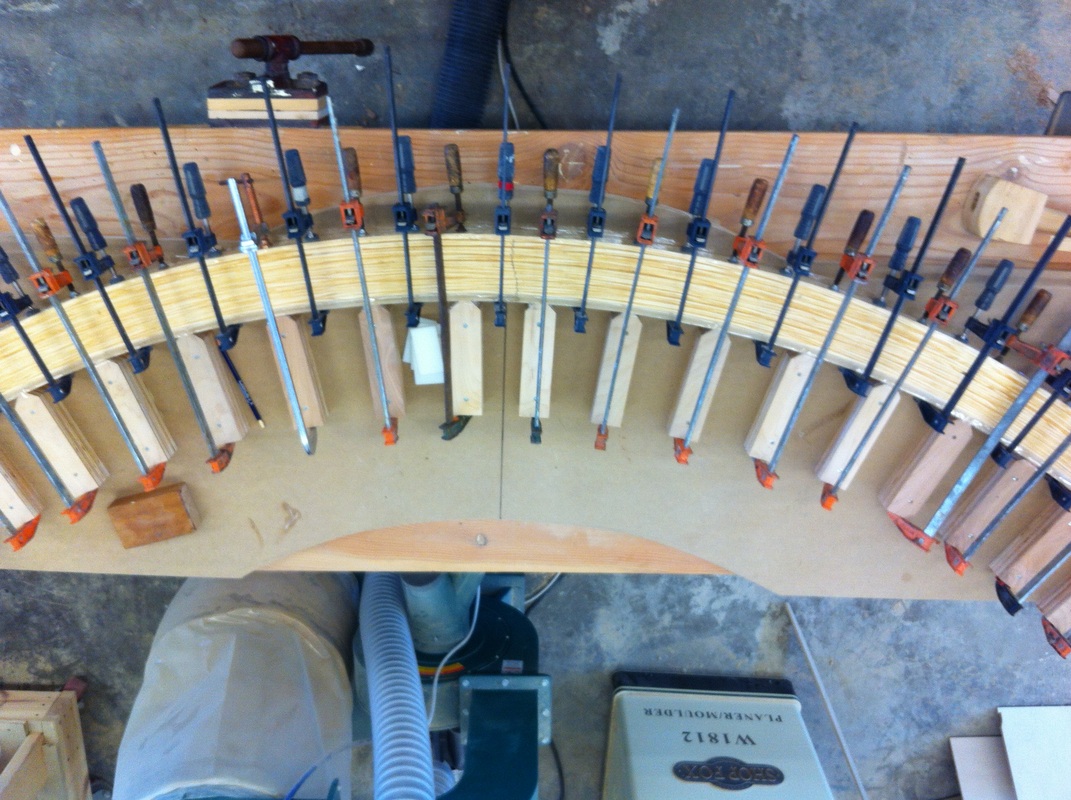
The freshly glued and newly clamped rafter.
So I finally gave up and broached the subject with my builder friend. A fine wood-worker by trade, he assured me  that a curved roof was very doable and he actually seemed to enjoy the thought of the challenges it might present.

Soon after I made the decision to go with a curved roof, some really great curved windows showed up! It seemed meant to be.

So here are the beginnings of my curved roof! We're using "glued lamination" to make the rafters, which will be exposed and visible from inside the house. 
tiny house, curved rafter
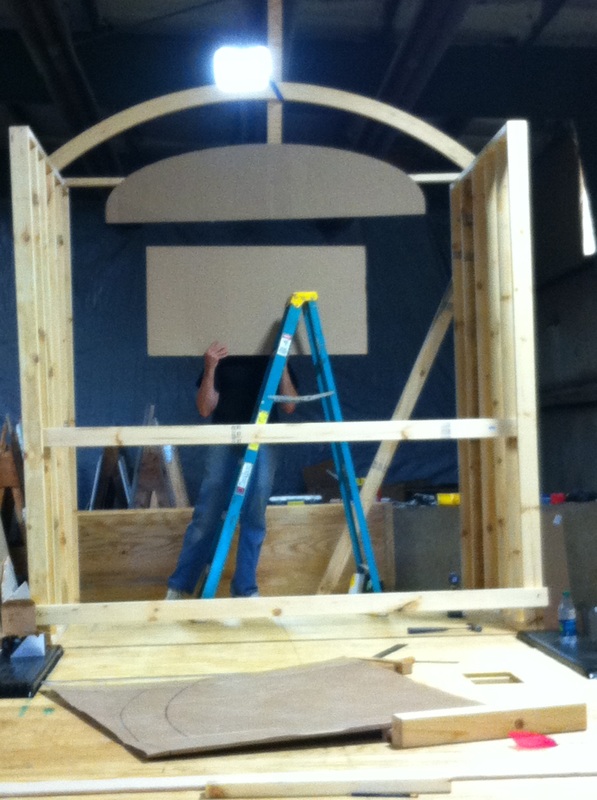
A single rafter more or less in position.
First Mr. Woodworker made a jig for forming the rafters. Then we cut yellow pine into 1/4 inch strips and made those strips into a sort of layer cake with glue between each one. Next we clamped-clamped-clamped, as fast as we could, hoping we'd get everything into position before the glue set. 

The next day we took the clamps off and discovered that everything had worked so well that, not only was the wood beautifully curved, there had not even been any "spring back." We had purposely made the curve a little tighter than necessary, expecting that the wood would spring back when released from the clamps, so the next thing we did was to put the arch over the curved end windows to see how the curve of the rafter looked over the curve of the window. Fortunately, we liked it.

In the last picture you can see some of the wall framing, temporarily screwed in place, and cardboard forms in the shapes of the windows in the end wall, so that we could begin to visualize the interior space more clearly.
Curved rafters for my tiny house!
17 Comments
manu
7/19/2014 05:04:52 am

:)

Reply
Christina
7/19/2014 11:40:25 am

Pretty curvy comment, Manu!

Reply
James Powell
2/3/2015 08:13:19 pm

Hi, what glue did you use for the laminated rafters? It looks great! I am thinking of doing something similar on a shed roof in Ireland

Reply
Christina
2/4/2015 12:22:47 am

Hi James,
We used Titebond III. A curved roof shed would be gorgeous!

Reply
AF
2/6/2015 02:31:27 pm

Hi there, may I ask what the thickness and depth of your rafters are? Do you have to worry about heavy snow load where you live? Thanks!

Reply
Christina
2/9/2015 11:44:12 am

Hi AF,
The rafters are about 2" X 4". We do get snow here, but certainly not the heaviest snow loads I've heard of.

Reply
Justin E
9/2/2015 01:08:50 am

Do you have any more details on how you built this arched rafter? Or do you know a link somewhere online that could help with the process or building a jig? Really interested in installing an arched roof on our proposed tiny home instead of a low-pitch gable or a gambrel roof, but other than 'we did it with a jig' I'm not seeing much in the way of the process online, and unfortunately, I don't have many carpenter friends. THANKS!

Reply
Christina
12/4/2015 03:04:04 pm

Sorry to be so long in getting back to you!
I suggest you look up Dee Williams Don Vardo plans online as she gives instructions on how to do curved rafters.

Reply
LD
7/31/2016 12:13:55 pm

Hi,
So lovely!
We have begun our tiny house and I am dreaming of a curved roof. A few questions...have you seen any spreading in your walls since there are no cross ties? Also, has it stood up to any snow? I'm also wondering the final dimensions of your roof beams, and how closely you spaced them?
Any other advice greatly appreciated.

Reply
Christina
8/1/2016 07:16:35 pm

Thanks, LD!
I can tell you what we did, but please don't take any of it as advice-- talk to qualified builders and engineers!
The rafters ended up being just under 2 feet apart and measuring 2x4", So far so good as far as wall spread. We did tie them at the bathroom and at the bed. Also used a rather beefy top plate, but still, time will tell.... The cabin took last year's snow just fine, but we didn't have a whole lot.
If I had to give some advice, I would say, build in as much venting, air circulation and moisture mitigation as you can. I'm really happy I put in vents and exhaust fans in the kitchen and bathroom and if one of them dies, I'll replace it with a more powerful one.

Reply
LD
8/1/2016 09:36:42 pm

Thank you for the advice. We have been warned about problems with ventilation and condensation, but I hadn't gotten as far as thinking about vents.
One builder we talked with recommended rafters 16" apart, as we sometimes get 4 feet of snow, so I think we will probably go with that. Beefy top plate sounds good, too.
Thanks again!

Jeff Allen
11/18/2017 09:14:46 am

Yikes, I didn't even think about that issue. Funny, I certainly did when designing my peaked roof!
Doh moment. Maybe I'll toss a pair of sturdy cross ties in. I just want enough room so I can stretch and do yoga moves, etc. ;)

Reply
Christina
8/2/2016 09:27:08 am

4 feet of snow--wow, that is impressive!

Reply
Emily
5/17/2017 01:40:49 pm

I am planning to do something similar - I think I am going to cut the 1/4" strips out of 2 x 4 studs. Is that what you used?

Reply
Christina
5/19/2017 06:41:36 pm

Hi Emily-
The lumber we used was a bit larger, but I don't think it needed to be.
If you haven't already, I would suggest you check out Dee William's Don Vardo plans for tips on making the rafters. I think she recommends 1/4" strips of cvg fir.
https://padtinyhouses.com/product/don-vardo-tiny-house-plans/

Reply
Virginia
9/30/2017 06:53:02 am

I'm curious about the rafter tails and how you finished the edge of the roof- I can't seem to find a post for that. Also- what dimension was the white pine you started with before ripping it to 1/4"...I'm planning a curved roof for my house and would love to see more of your method- Thanks!

Reply
Christina
10/4/2017 07:52:42 pm

Hi Virginia,
Sorry for the delay in getting back to you. It's been a while since we finished the build, so rather than trusting my memory on the details, I'll refer you to Dee William's Don Vardo plans. We pretty much followed her method. https://padtinyhouses.com/product/don-vardo-tiny-house-plans/

Reply

Your comment will be posted after it is approved.


Leave a Reply.

    RSS Feed

    Archives

    November 2014
    October 2014
    September 2014
    August 2014
    July 2014
    June 2014
    April 2014

    My Tiny Home

    *8x20' (approx)
    *curved roof 
    *on wheels
    *composting toilet

    *currently occupied

    Photo Gallery

    Picture
    Click photo to go to the gallery!

    Categories

    All
    Bed
    Curved Roof
    Flashing
    Floor
    Framing
    House Wrap
    Insulation
    Kitchen
    Plumbing
    Q & A
    Roof
    Size
    Storage
    Toilet
    Trailer
    Walls
    Windows
    Wiring

    People and Places to Love

    Cob House Journal
    Ecocorps Systems
    Hybrid Straw Bale Build
    Quailsprings  
    SPIN Gardening
    Straight Ash
    Zyl Vardos
    Dee Williams and PAD
    Evan and Gabby
    Roulottes USA

    Big THANK YOUs to

    Tiny Home Builders
    Howell Machine & Engineering
    Creative Edge
    Everybody's Whole Foods
    Green Building Supply
    Oregon Shepherd
Powered by Create your own unique website with customizable templates.